 Vonode
Node software · step by step
From an empty desk to a paired node
What to buy, how to prepare a small Linux computer, install the node software, scan the pairing QR code in the Vonode app, and choose between the free plan and a subscription. The short version for people who already have a module and a Linux computer is on the install page.
The node has no web interface. You install it once, pair it with the app, and manage everything from the app. Without a subscription the node runs the free plan: the app shows the SMS that one number you choose receives over the cellular network. Every other feature (calls, Wi-Fi calling, sending SMS, notifications, eSIM profiles, proxies, automations, more numbers) needs an active Vonode subscription, bought in the app. One subscription unlocks one node.
What you need
A cellular module
Vonode drives Qualcomm-based Quectel modules through their USB serial (AT) and QMI interfaces. Which modules have been tested is listed on the hardware page. In short: the DJI Cellular module, which contains a Quectel EG25-G, has been tested on an amd64 computer with Ubuntu 22.04. Other Quectel modules of the same families (EG25-G on its own, EC25, EC20, EC21, EM05/EM06, RM500Q) are supported by the code but not tested yet.
Calls over Wi-Fi calling work on the tested module. Calls over the cellular network are not supported on it, and have not been confirmed on any other module yet.
Form factors, from simplest to most flexible:
- USB dongle with the module built in (a module in a plastic case, one SIM slot, two small antennas). Plug and go. Make sure the listing says the dongle exposes serial and QMI ports (“for Linux”, “AT commands”, “QMI”); dongles that only present a network card (HiLink, RNDIS-only or ECM-only firmware) are not supported.
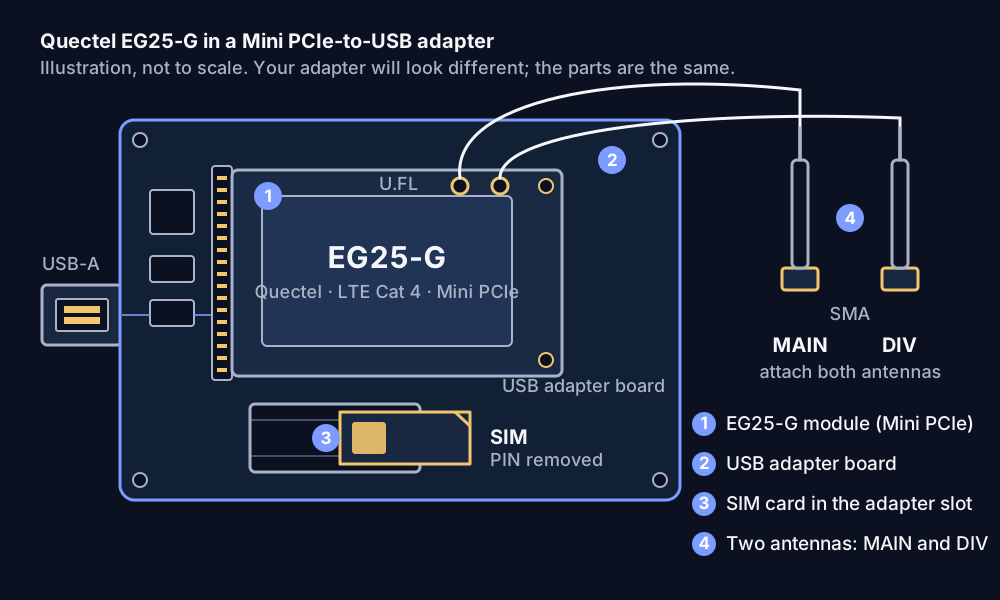
- Mini PCIe module in a USB adapter. A Mini PCIe-to-USB adapter board with a SIM slot and two antenna pigtails (SMA or IPEX). This is the usual way to run several modules on one host.
- M.2 module in an M.2-to-USB adapter for the 5G RM500Q.
- DJI Cellular module. Its USB identity must be switched once before Linux recognises it; the steps are on the hardware page.
Attach both antennas (main and diversity) and place the host where a phone would get signal: near a window rather than in a cabinet. For Wi-Fi calling the module still needs to see the cellular network at least once to register.
A host computer
- Any 64-bit x86 (amd64) Linux computer. An Intel N100 mini PC (fanless, 8 GB RAM, a small SSD) is a good match: enough USB ports, low power, silent. A used thin client or NUC works equally well. 2 GB RAM and 4 GB disk are plenty for the node itself.
- Debian 12, Ubuntu 22.04 or later, or Fedora. ARM boards such as the Raspberry Pi are planned for 1.3.1; OpenWrt routers, Docker Desktop on macOS or Windows and virtual machines without USB pass-through are not supported.
- A powered USB hub if you connect more than one module. A module draws up to 2 A at transmit peaks; two modules on unpowered motherboard ports often cause random resets and “modem disappeared” problems.
- Wired Ethernet to your router is recommended.
SIM, eSIM and the network
- A nano SIM with the right adapter frame for the slot (Mini PCIe adapters usually take a standard or micro SIM). Remove the SIM PIN beforehand (do it in a phone), or the node cannot use the card.
- The modules have no built-in eSIM. To use eSIM profiles, put a removable eUICC card (“eSIM card”, “physical eSIM”) in the slot; the Vonode app can then download, switch and delete profiles on it (subscription feature).
- Wi-Fi calling (VoWiFi) must be enabled on the plan by your carrier, exactly as for a phone.
- The phone must be able to reach the node on one TCP port (2222 by default): a port forward on your router, or a VPN such as WireGuard or Tailscale between the phone and the host. Behind carrier-grade NAT (no public IPv4), use the VPN route.
Prepare the host
Install the Linux distribution, connect it to the network and log in as a user who can use sudo. Then update the system and stop ModemManager, which competes for the modem ports:
$ sudo apt update && sudo apt full-upgrade -y$ sudo systemctl disable --now ModemManager
Plug in the module and check that Linux sees it:
$ lsusb | grep -i -E 'quectel|2c7c|qualcomm|05c6'$ ls /dev/ttyUSB* /dev/cdc-wdm*
You should see one Quectel line per module, four ttyUSB ports and one cdc-wdm port per module. If not, see Troubleshooting.
Download the node package
Every release is published on the Vonode node releases page as vonode_<version>_linux_amd64_commercial.tar.gz, with its SHA-256 checksum, the software bill of materials and the source of its GPL and LGPL components. Download, verify and extract it:
$ curl -fLO https://github.com/vonode/vonode-releases/releases/download/<version>/vonode_<version>_linux_amd64_commercial.tar.gz$ curl -fLO https://github.com/vonode/vonode-releases/releases/download/<version>/vonode_<version>_linux_amd64_commercial.tar.gz.sha256$ sha256sum -c vonode_<version>_linux_amd64_commercial.tar.gz.sha256$ tar -xzf vonode_<version>_linux_amd64_commercial.tar.gz
Install the node (systemd package)
Recommended for this release. The systemd package installs the node as two services, without Docker.
Run the installer from the top folder of the package:
$ cd vonode_<version>_linux_amd64_commercial$ sudo ./install.sh
The installer puts the program in /opt/vonode, keeps an existing configuration and database, creates the system user vonode-gateway (UID and GID 10001) and starts two systemd services: vonode, the core, and vonode-gateway, the encrypted SSH gateway the app connects to.
On first start the node creates a random administrator password and keeps only its hash in the configuration. The plain text is in /opt/vonode/config/initial-admin-password, readable by root only. You rarely need it.
Show the pairing QR code, with the address the phone will use to reach the node: your DDNS name or public IP when you forward the port, or the host's VPN or LAN address. Add -port <port> if you forward a different port.
$ sudo /opt/vonode/vonode pair -c /opt/vonode/config/config.yaml -host node.example.comThe terminal shows the QR code as a block graphic. It is valid for five minutes and works once; run the command again for a new one.
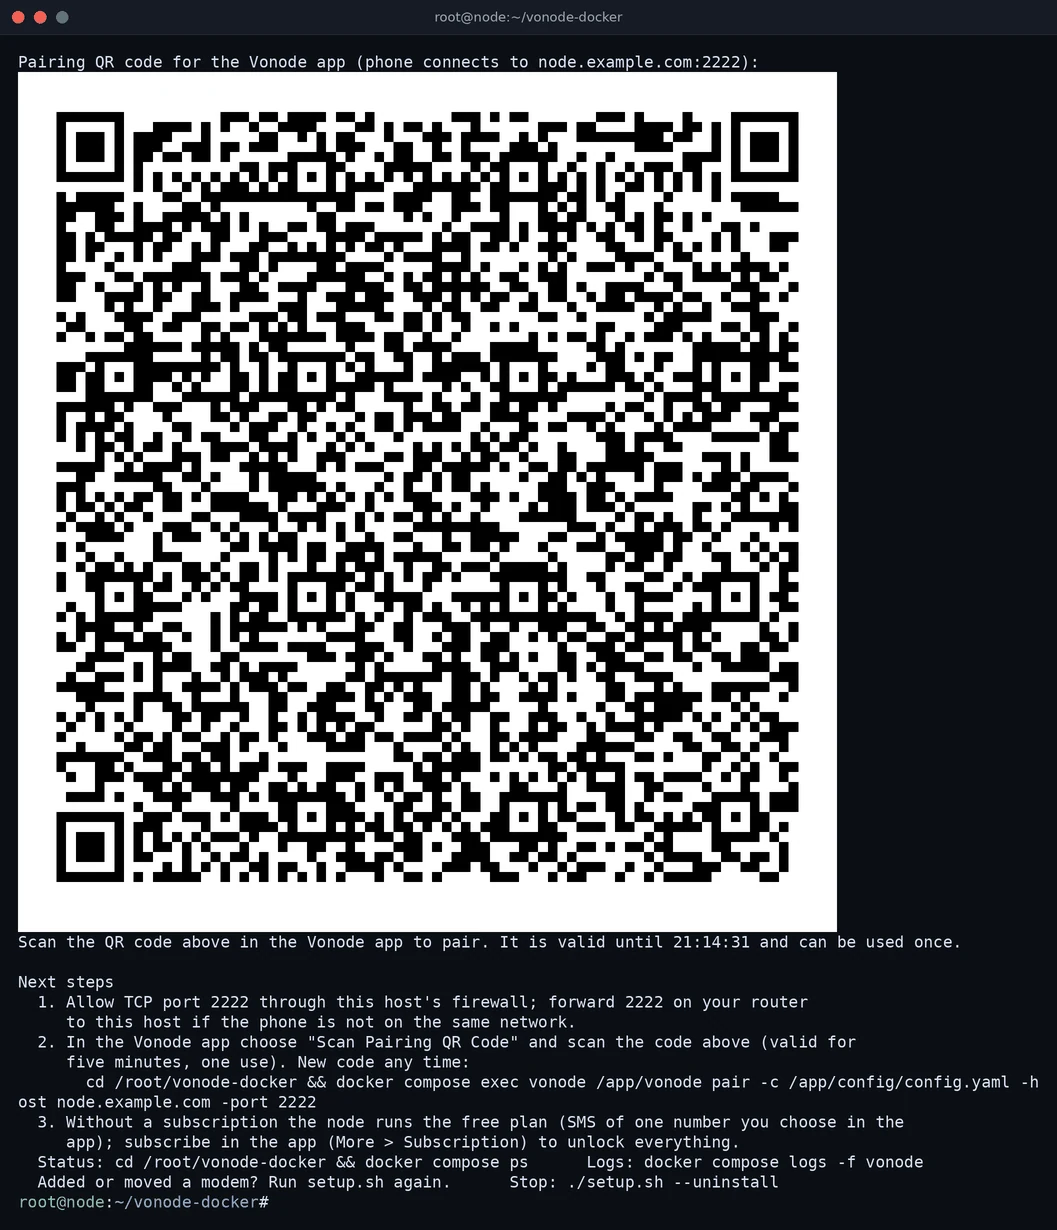
Open TCP 2222 on the host firewall and forward it on the router if the phone will connect from outside:
$ sudo ufw allow 2222/tcpPair the app
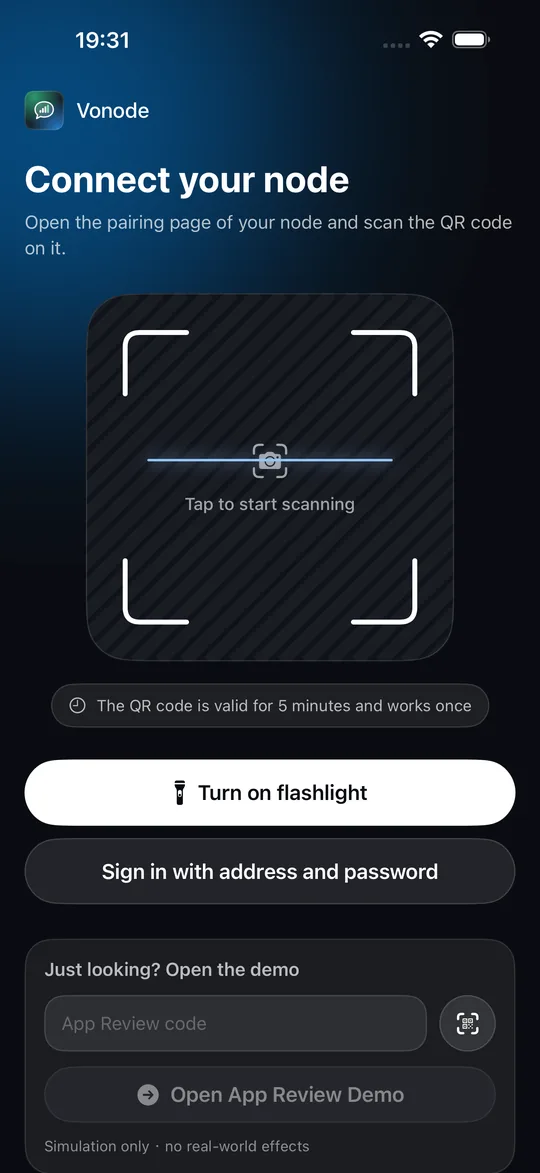
Install Vonode from the App Store (free download) and open it. On the Connect your node screen, tap the scanner and point the camera at the QR code in the terminal. The app connects to the node over SSH, pins the node's host key and shows the node on its home screen.
Free number or subscription
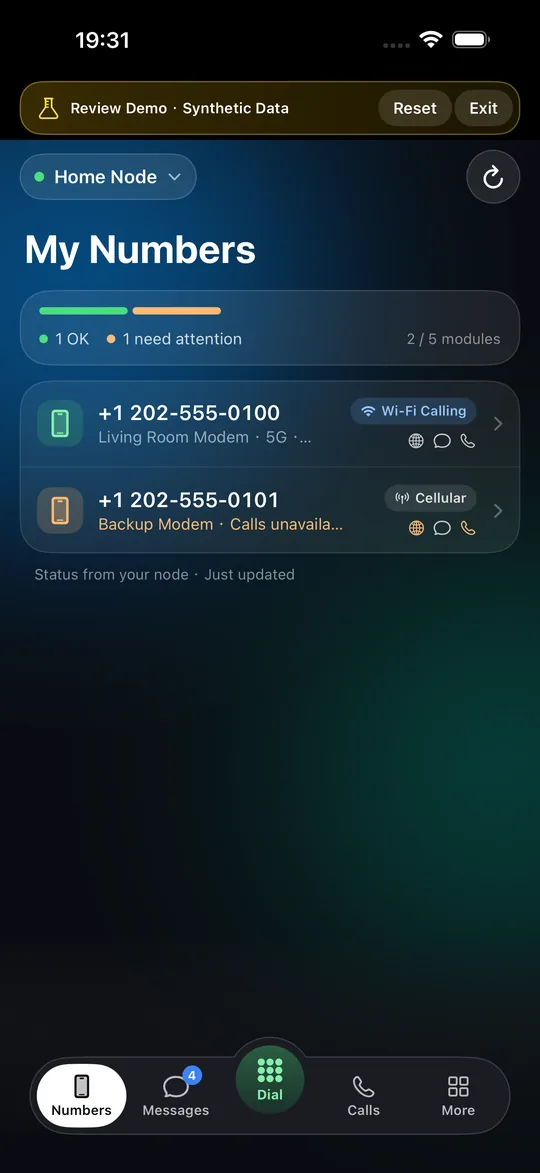
Free plan. Open the Numbers tab and pick the one number whose SMS you want to see. The choice is permanent for this node; a backup restore keeps it. From then on the Messages tab shows the SMS that number receives; you can read and delete them.
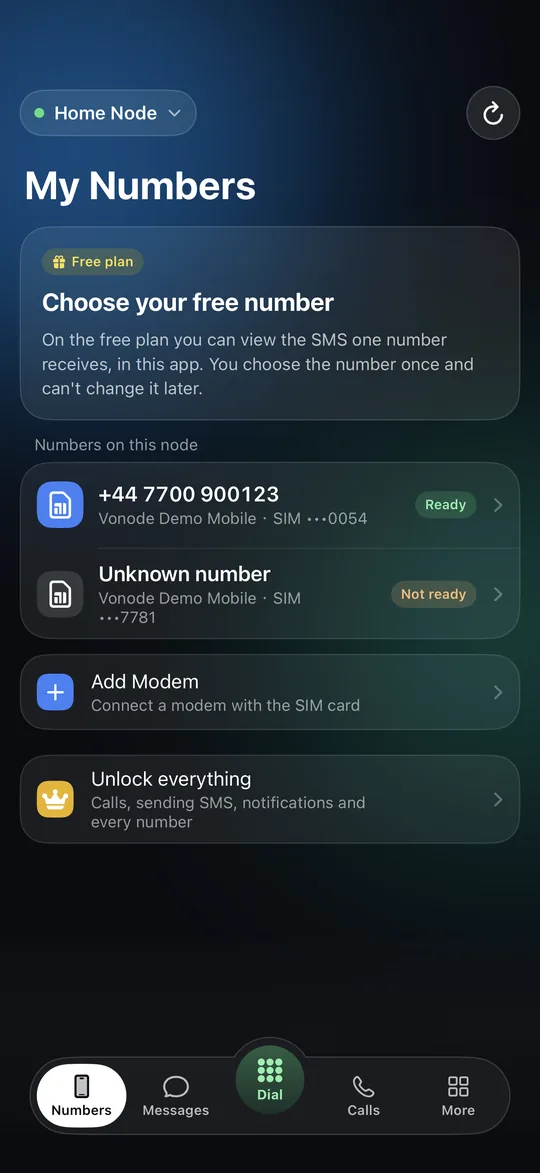
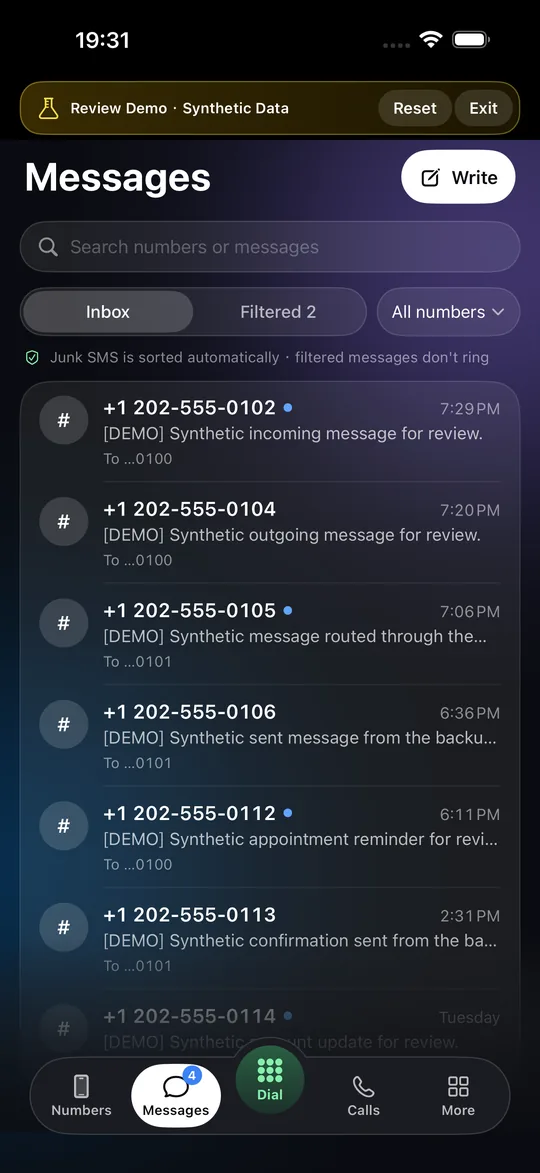
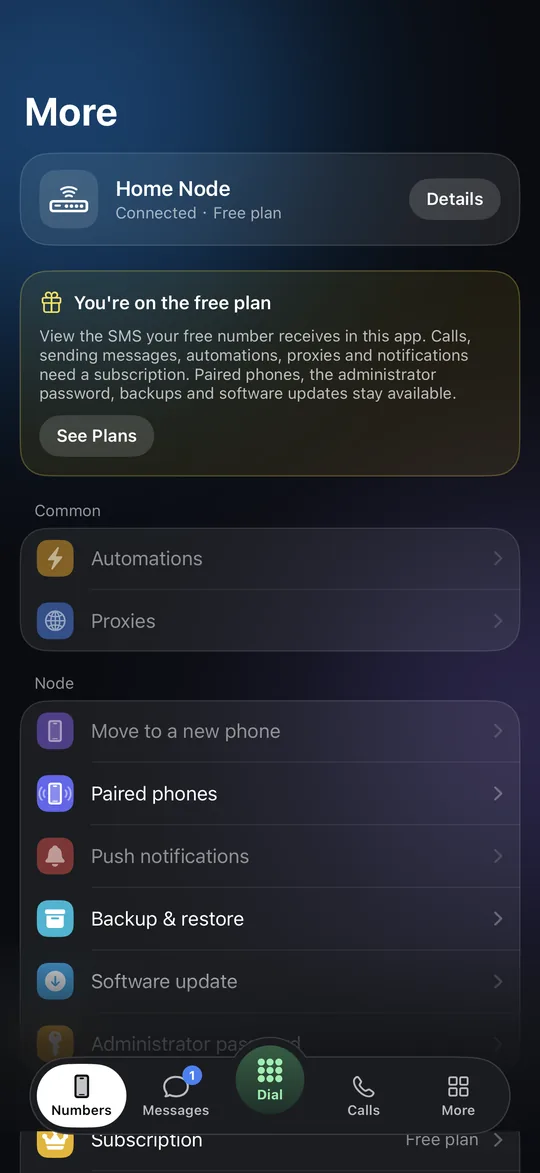
Subscription. Open More, then See Plans (or More > Subscription), and subscribe. Apple bills you; the app hands the signed transaction to your node, which unlocks within a few seconds and restarts into full mode. Then add your modules with Add Modem, switch Wi-Fi calling on per SIM and set up calls, eSIM, notifications and automations as you like.
Everyday operation
With the systemd package the node runs as two services, vonode and vonode-gateway.
Status and logs
$ systemctl status vonode vonode-gateway$ journalctl -u vonode -f
Restart
$ sudo systemctl restart vonodeRestarting or stopping takes up to two minutes: the node first de-registers Wi-Fi calling and closes its tunnels.
Lost administrator password
$ sudo systemctl stop vonode$ sudo /opt/vonode/vonode reset-password -c /opt/vonode/config/config.yaml$ sudo systemctl start vonode
Stop the service, reset the password and start it again. All phones are signed out and pair again.
- Backups: More > Backups in the app. A backup carries messages, call history and the subscription binding; keep it private.
- A lost phone can be removed from the app's list of paired phones.
- Subscription ends: if a subscription ends without renewal, the node keeps working for 72 hours so the app can deliver the renewal; open the app to renew. After that, or immediately after a refund, the node returns to the free plan and only shows the SMS of the chosen number.
Move to new hardware
In the app, create and download a backup on the old node, install and pair the new node, then import the backup, restore it and restart. The backup carries the node's subscription binding, so the new node unlocks without a new purchase, and it keeps the number already chosen for the free plan. Keep backups private: they contain messages, call history and the binding. Do not keep running the old node with the same data.
Troubleshooting
“ModemManager is running”
It grabs the serial ports before Vonode. Disable it and restart the node:
$ sudo systemctl disable --now ModemManager$ sudo systemctl restart vonode
No modem detected
If lsusb shows nothing from Quectel (2c7c), try another cable and port, use a powered hub, and check the kernel log for USB power errors (“over-current”, “device not accepting address”). If lsusb lists the modem but /dev/ttyUSB* is missing, load the drivers, then unplug and replug the module. Some adapters ship with the module in a mode without USB serial ports; follow the adapter vendor's instructions to enable them, and for a DJI Cellular module see the hardware page.
$ sudo dmesg | tail -n 30$ sudo modprobe -a option qmi_wwanThe app cannot connect
From a device outside your network, test the port. No answer means the router forward or firewall is wrong, or your internet provider uses carrier-grade NAT (no public IPv4). In that case run a VPN (Tailscale, WireGuard) between the phone and the host and pair with the host's VPN address, or use the node's relay option described in the node documentation.
$ nc -vz node.example.com 2222Pairing code expired or already used
Codes last five minutes and work once; create a new one with the pair command in Install the node.
Wi-Fi calling will not register
The SIM needs Wi-Fi calling enabled on the plan, the module must have registered on the cellular network at least once with that SIM, and the host needs working IPv6 or IPv4 to the carrier's ePDG. The app's diagnostics page shows the current phase; the support bundle it can export is what to send to support.
Wrong time in messages
The node uses the host's time zone. Set it with timedatectl (with Docker, pass --tz Europe/London, an IANA zone name, to the setup script).
Docker Compose (coming soon)
Coming soon. The commercial Docker image is not published yet, so this path is not available for this release; use the systemd package above. The steps below show how the Docker setup will work.
Until the image is published, setup.sh stops and asks for an image: pass --image vonode/vonode@sha256:<digest> from the release notes when a version provides one, or use the systemd package (sudo ./install.sh in the top folder of the package, one level above docker/), which is the supported install path for this release.
Install Docker Engine and Compose
Docker's convenience script installs Docker Engine and the Compose plugin on Debian, Ubuntu and Fedora. The last command must print a Compose v2 version.
$ curl -fsSL https://get.docker.com | sh$ sudo systemctl enable --now docker$ docker compose version
Run the setup script
Run it from the package's docker/ folder. --host is the domain or IP the phone uses to reach the node; leave it out and the script proposes the host's LAN address, which is fine for a first pairing on the same Wi-Fi.
$ cd vonode_<version>_linux_amd64_commercial/docker$ sudo ./setup.sh --host node.example.com --image vonode/vonode@sha256:<digest>
The script checks the host (Linux, amd64, root, Docker, Compose, ModemManager), prints the modules it found with their device nodes, creates config/, data/ and logs/ next to itself, writes .env and docker-compose.override.yml, pulls the image, starts the two containers (vonode, the core, and vonode-gateway, the SSH gateway for the app) and waits until both report healthy, about half a minute on a first start. By default the whole /dev is bound into the core so re-enumerated and hot-plugged modules keep working; --devices maps only the device nodes present now. A mutable image tag is refused unless you add --allow-tag. It then prints where the initial administrator password is (config/initial-admin-password, root only) and shows the pairing QR code.
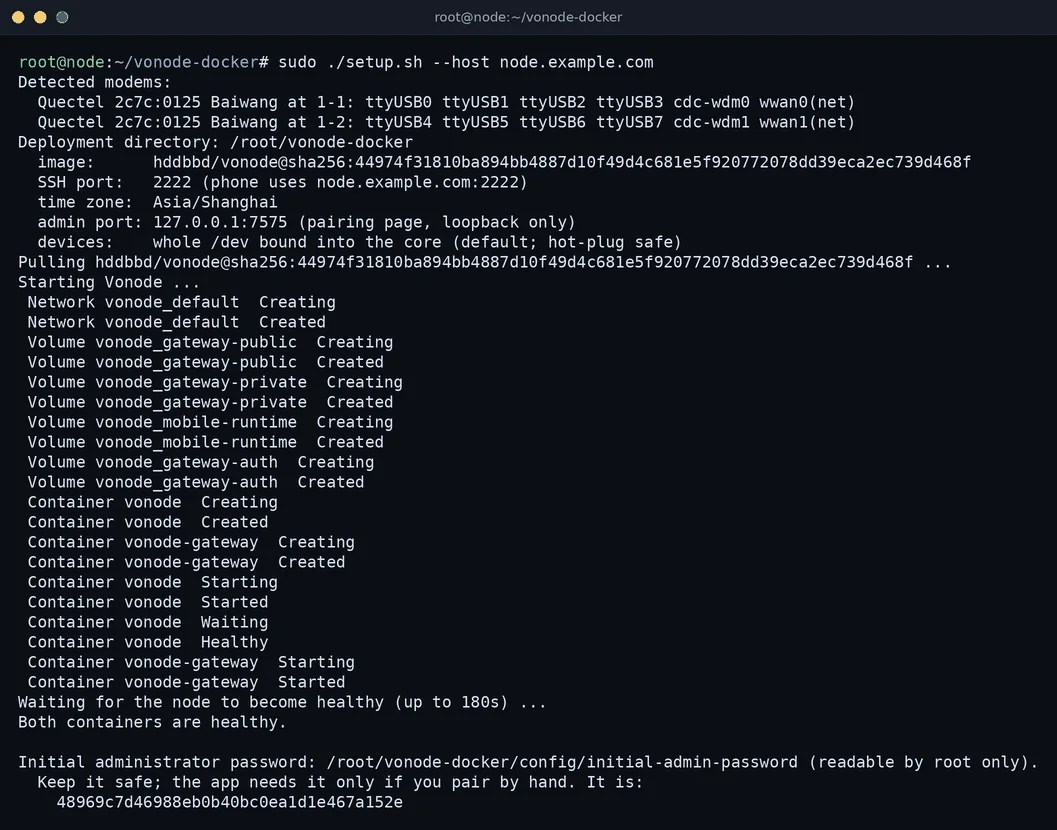
Pass --port <n> to use another SSH port and --public-port <n> when the router forwards a different external port. A new pairing code any time, in the same folder:
$ sudo docker compose exec vonode /app/vonode pair -c /app/config/config.yaml -host node.example.com -port 2222Everyday operation with Docker
All commands run in the package's docker/ folder.
| Task | Command |
|---|---|
| Status (both services healthy) | sudo docker compose ps |
| Logs | sudo docker compose logs -f vonode |
| New pairing code | sudo docker compose exec vonode /app/vonode pair -c /app/config/config.yaml -host <address> -port 2222 |
| Added or moved a module (re-detects modules, keeps everything else) | sudo ./setup.sh |
| Restart (up to two minutes) | sudo docker compose restart vonode |
| Stop, keep data | sudo ./setup.sh --uninstall |
| Remove everything | sudo ./setup.sh --uninstall --purge |
| Lost administrator password (all phones pair again) | sudo docker compose stop vonode, sudo docker compose run --rm --no-deps vonode reset-password -c /app/config/config.yaml, sudo docker compose start vonode |
| Upgrade: put the new image reference in .env (or pass --image) and run the script | vonode/vonode@sha256:<digest> → .env / --image, sudo ./setup.sh |
Never run docker compose down -v: the vonode_gateway-private volume holds the SSH host key that paired phones pin. setup.sh --uninstall keeps it.
- Port 127.0.0.1:7575 is already in use: another program uses the node's local pairing-page port. Run
sudo ./setup.sh --admin-port 17575(any free port); the script writes the port into the configuration and the Compose environment together. - Containers not healthy:
sudo docker compose logs vonodeshows why. The core is healthy once its internal socket exists;vonode-gatewayonce it can reach that socket and listen on 2222. A port conflict on 2222 (ss -ltn | grep 2222) is the usual cause; choose another port with--port. - Ports changed after a module reset: a module that resets re-enumerates and may get other
ttyUSBnumbers. With the default/devbinding they appear by themselves; if you chose--devices, runsudo ./setup.shagain.
Legal
The node software is proprietary software of VONODE LLC. Third-party components and their licenses are listed in the package's THIRD_PARTY_NOTICES.txt and SBOM. Vonode is not an emergency service: use it only with SIMs, numbers and networks you are authorized to use, and follow your carrier's terms.